


That sudden rattle, that worrying hum, that shaking you can feel through the floor—when your SEEPEX pump starts sounding like a toolbox in a dryer, it’s more than just annoying. Excessive noise and vibration are urgent distress signals from your pump, and ignoring them can lead to catastrophic failure in hours. But is the culprit the hard-working rotor, or the critical motion-transferring universal joint? Misdiagnosis means wasted time and money. This definitive, step-by-step guide will help you pinpoint the exact source of the problem quickly and accurately, so you can fix what’s actually broken.
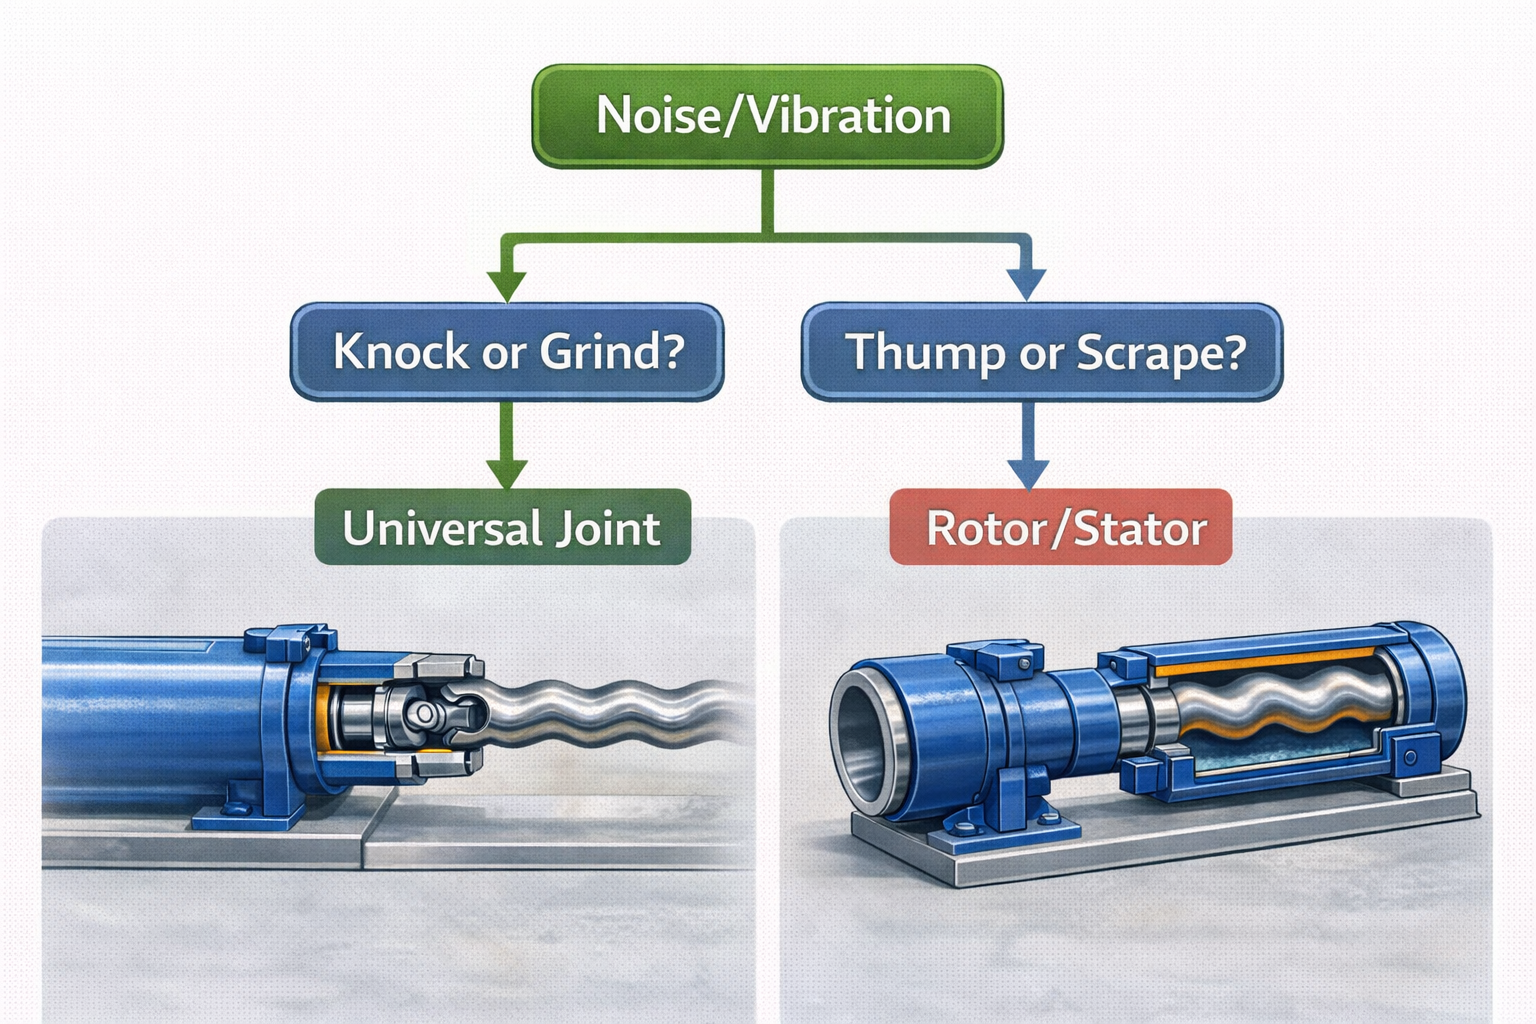
Excessive noise and vibration in SEEPEX progressive cavity pumps typically originate from either a worn/damaged universal joint assembly or an imbalanced/obstructed rotor. You can identify the source by systematically isolating components: First, check for external causes and universal joint play without disassembly. Then, by separating the pump from the stator housing and manually rotating the drive shaft, you can feel and hear if the issue is in the joint (grinding, knocking) or if it follows the rotor (scraping, imbalance). This guide provides a clear diagnostic flowchart.
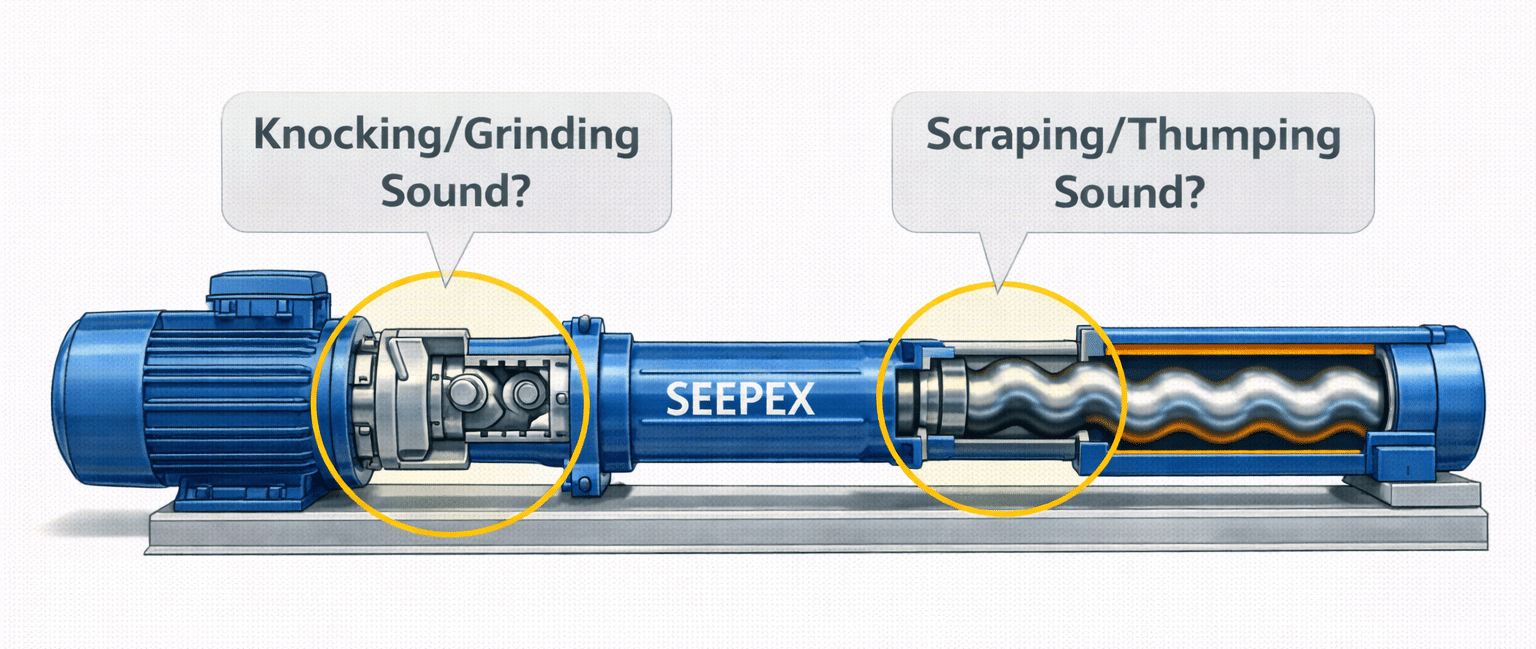
Table of Contents
- First Response: Safety and Immediate External Checks
- Step 1: The Isolation Test – Separating Drive from Pump
- Step 2: Diagnosing the Universal Joint Assembly
- Step 3: Diagnosing the Rotor and Stator Assembly
- Step 4: Interpreting the Sounds and Feelings
- Conclusion: From Diagnosis to Solution
1. First Response: Safety and Immediate External Checks
Before you blame the pump’s internals, always rule out the simple stuff. External issues can create vibrations that sound like they’re coming from the pump itself, leading you on a wild goose chase inside the wet end.
Think of it like a car shaking at high speed. Before rebuilding the engine, you’d check the tires. Your SEEPEX pump is part of a system, and that system’s foundation and connections are the first place to look when trouble starts.
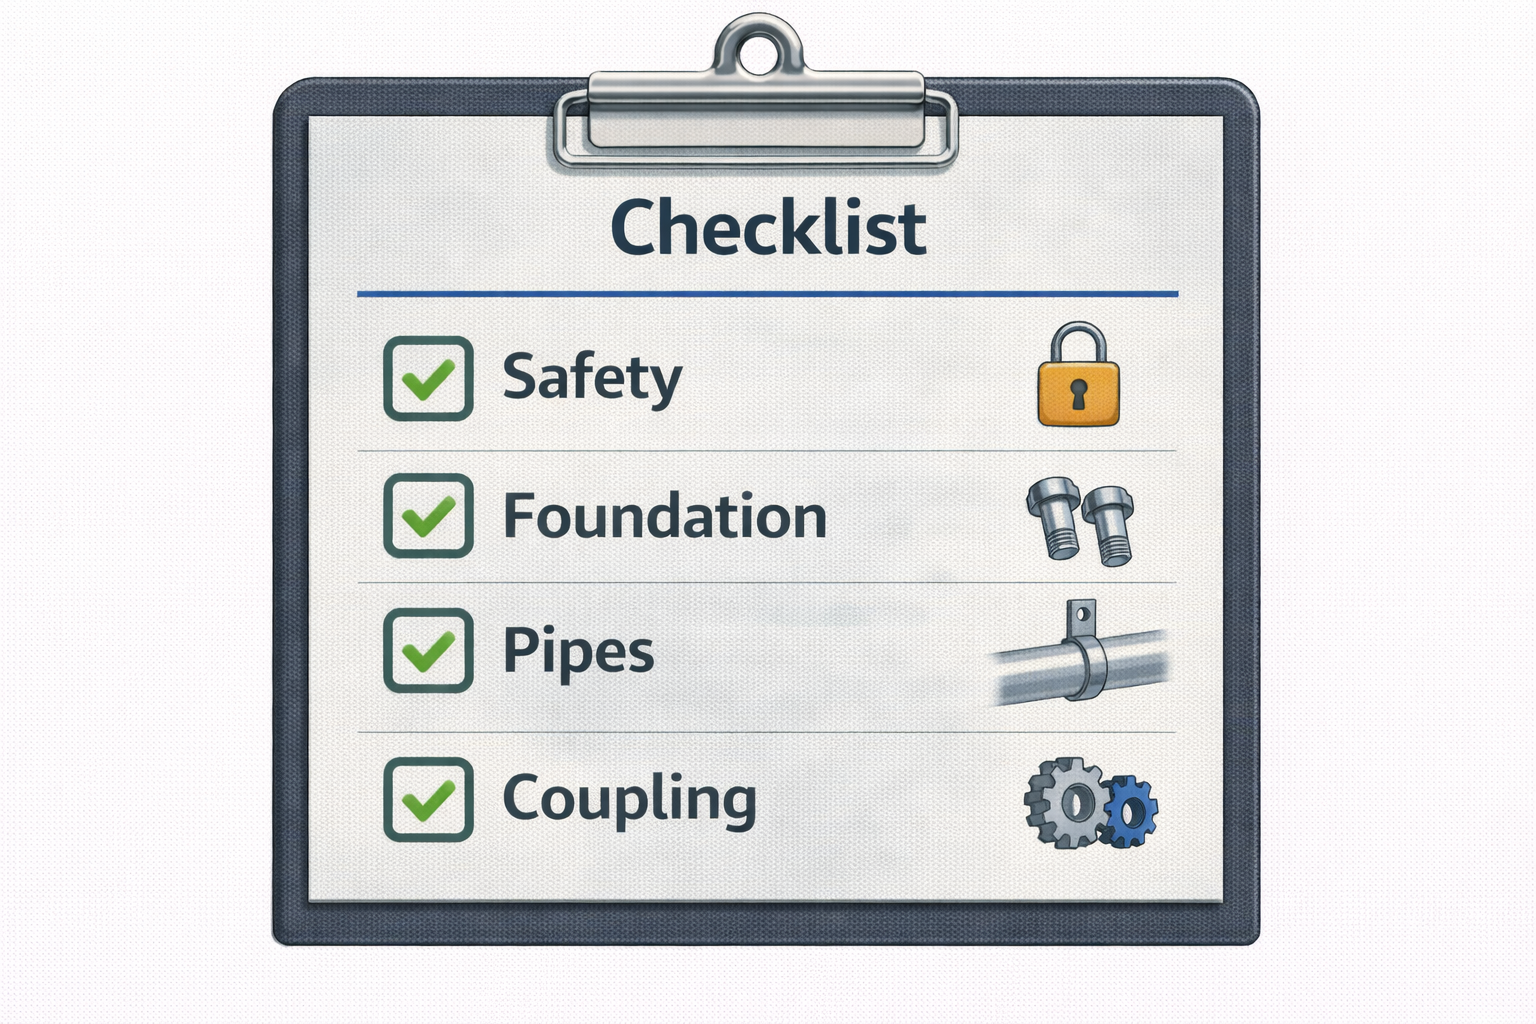
Always start with Lockout/Tagout (LOTO) to ensure zero energy. Then, perform these 3 external checks:
Foundation & Mounting: Are all pump and motor mounting bolts tight? Is the baseplate cracked or corroded?
Pipework Strain: Are the suction and discharge pipes independently supported? Excessive force on the pump flanges can misalign it.
Coupling Alignment: Between the motor and pump drive, is the coupling properly aligned and are all its bolts and spiders intact? A worn coupling is a prime noise maker.
Skipping these steps is the most common diagnostic error. A loose foundation bolt can mimic internal imbalance perfectly.
The Ripple Effect of External Issues:
A simple misalignment doesn’t just cause vibration; it creates a bending moment on the pump’s drive shaft. This forces the universal joint to operate at an angle it wasn’t designed for, accelerating wear on the pin and bushing set. What started as an external fix turns into an internal repair if left unchecked.
| External Symptom | Possible Cause | Quick Test |
|---|---|---|
| Low-frequency shaking | Loose mounting bolts or weak base. | Use a wrench to check all bolt torque. |
| High-frequency buzz/rattle | Pipework vibrating against a support. | Manually hold pipes; does noise change? |
| Rhythmic knocking at motor speed | Misaligned or damaged coupling. | Visually inspect coupling for wear, check alignment with feeler gauges. |
2. Step 1: The Isolation Test – Separating Drive from Pump
Now we move to the pump itself. The core of this diagnosis is isolating whether the problem is in the drive train (universal joint, connecting shaft) or the wet end (rotor, stator). This step requires disassembly but is non-destructive.
The goal here is to create a clean split. You’re playing detective, separating the suspects to see which one is guilty. By disconnecting the rotor from the drive, you can test each system independently.
With the pump safely isolated and fluid drained, disconnect the suction and discharge piping. Unbolt the stator housing (the elastomer-lined tube) from the gear housing (where the universal joint is). Carefully slide the entire stator housing with the rotor inside away from the drive end. You now have two distinct assemblies: the Drive Assembly and the Rotor/Stator Assembly.

This physical separation is your most powerful diagnostic tool. It turns one complex problem into two simpler ones.
What You’ve Just Achieved:
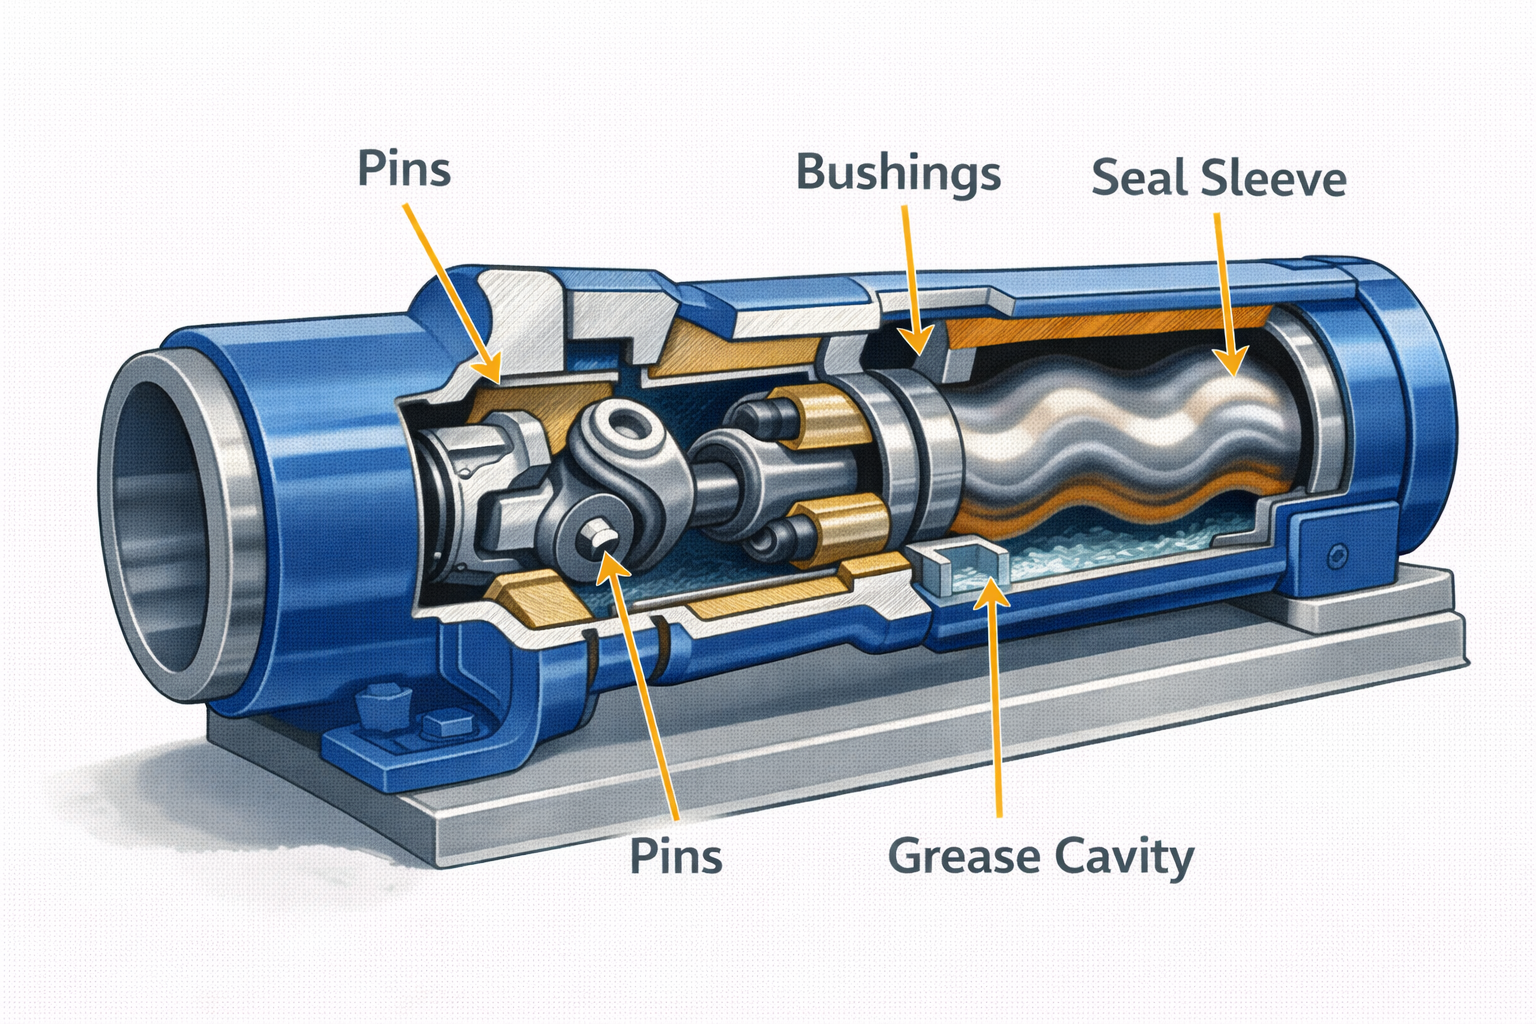
Drive Assembly (Gear Housing): Contains the connecting shaft, universal joint (pins, bushings, seal), and drive shaft. It’s now free to rotate without the resistance of the rotor in the stator.
Rotor/Stator Assembly: Contains the rotor seated inside the stator. You can inspect this as a unit.
Critical Tip: Mark the orientation of the rotor to the drive shaft before separation (a paint marker works). This ensures proper timing if you need to reassemble the same parts.
3. Step 2: Diagnosing the Universal Joint Assembly
With the drive assembly isolated, you can focus on the complex linkage that converts rotary motion into the rotor’s orbital path. Wear here creates distinct, mechanical failure sounds.
The universal joint is the pump’s wrist—it flexes with every rotation. When its pins, bushings, or seals wear, clearances open up. Metal starts hitting metal where it shouldn’t, creating the classic sounds of mechanical distress.
Perform the “Manual Rock Test”:
Grab the exposed end of the connecting shaft.
Try to rotate it back and forth (a few degrees) while feeling for “play” or a knocking sensation.
Now, try to move it up and down or side-to-side. Any lateral movement indicates severe bushing or pin wear.
Listen: As you slowly rotate the shaft by hand, listen for a grinding or gritty feel. This often means contaminated grease or severely worn bushings.
Understanding the joint’s construction makes diagnosis intuitive.
The Anatomy of a Failing Joint:
Worn Pin/Bushing: Causes radial play and a definitive “knock” or “clunk” at each revolution, often most noticeable at start-up or direction change.
Failed Joint Seal/Sleeve: Allows pumping media (especially abrasive slurry) to ingress into the joint cavity. This contaminates the grease, creating a grinding paste that accelerates wear. The tell-tale sign is media leaking from the joint vent or seal.
Dry/Degraded Grease: Lack of lubrication causes a high-pitched squeal or screech, especially under load.
Visual Check: If possible, inspect the grease. Black, gritty grease is a death sentence for the joint and confirms internal wear.
4. Step 3: Diagnosing the Rotor and Stator Assembly
Now, turn your attention to the wet end. Problems here are often related to interference, imbalance, or obstruction. The symptoms are usually felt as much as they are heard.
A perfectly matched rotor and stator move in a smooth, synchronized dance. Anything that disrupts this harmony—a bent rotor, a swollen stator, or a trapped solid—creates friction, impact, and imbalance, which translates directly to noise and vibration.
Inspect the Rotor In-Situ:
Look down the bore of the stator housing you’ve separated. Can you see the rotor?
Do NOT try to rotate the rotor while it’s inside the stator by hand (it will be very difficult). Instead, look for obvious signs:
Visible Damage: Are there deep grooves, gouges, or a bent helix on the rotor?
Stator Condition: Is the stator elastomer ripped, extruded, or visibly swollen?
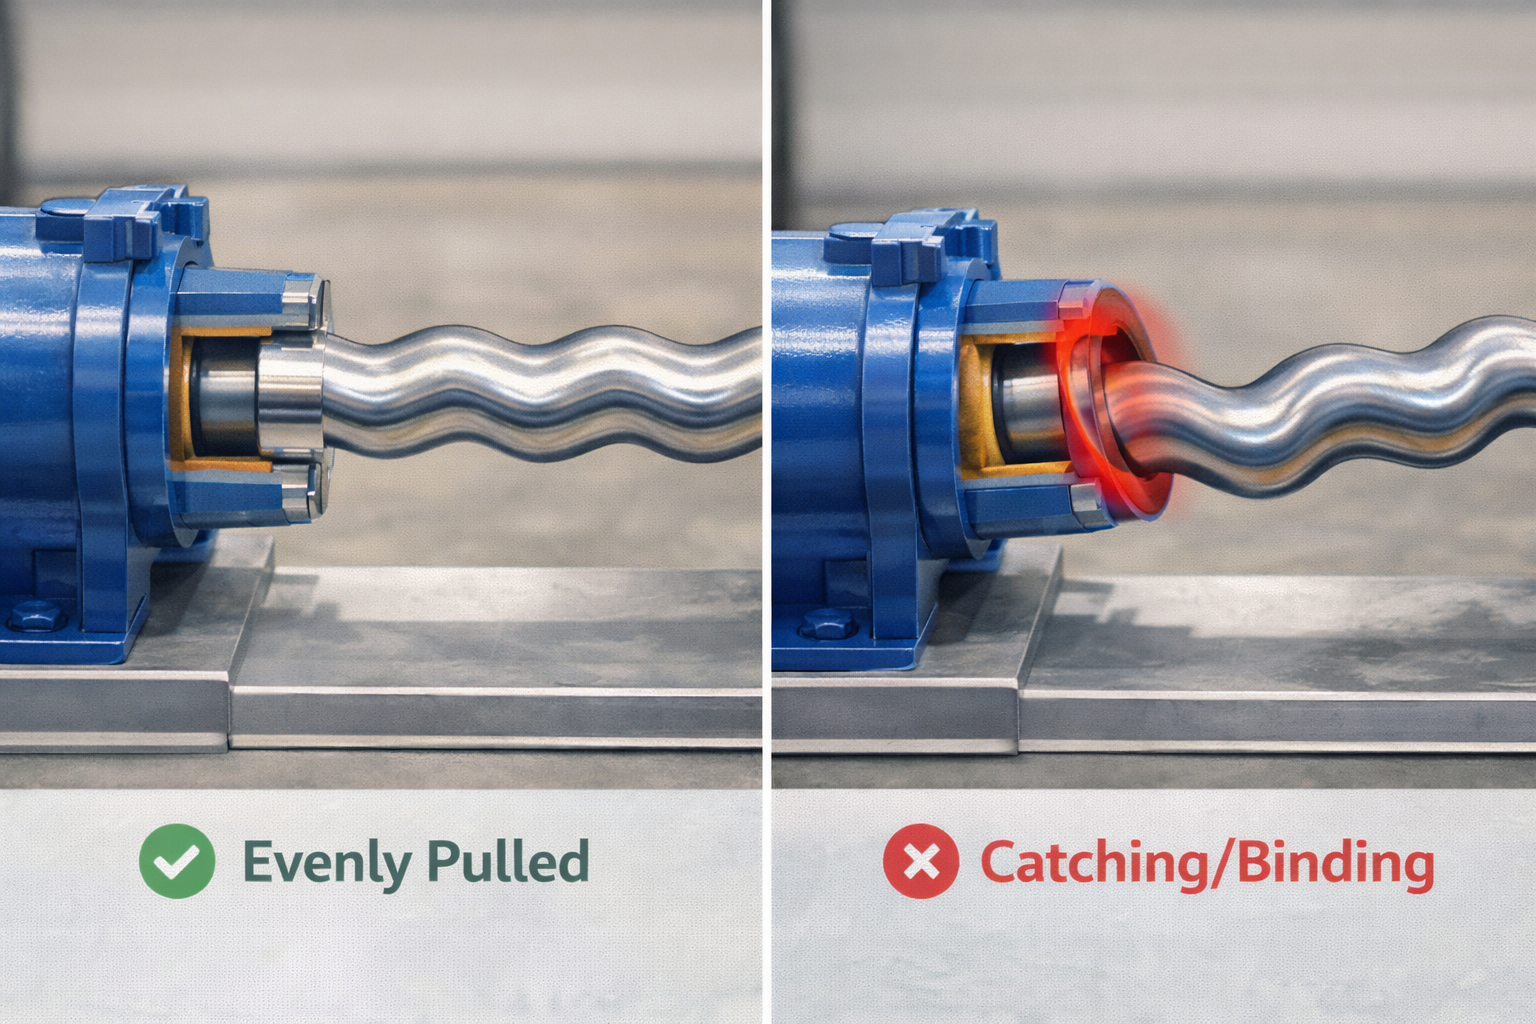
The “Withdrawal Test”: Carefully try to pull the rotor straight out of the stator. It should require firm, even force. If it binds or catches at a specific point, you’ve likely found a localized area of damage or swelling.
The interaction between rotor and stator tells a clear story of the pump’s internal life.
What Different Resistance Means:
Even, Firm Resistance: Normal. The elastomer is gripping the rotor as designed.
Very Loose Fit: The stator is worn out or the rotor is undersized from abrasion. This causes slippage and vibration but may not be the primary noise source.
Tight Spot or Binding: This is a major culprit. Causes include:
Stator Swelling: Chemical incompatibility has made the elastomer expand.
Foreign Object: A solid is embedded in the stator bore.
Rotor Warping/Bending: The rotor is physically deformed and contacting the stator unevenly.
Key Insight: A rotor-stator problem often creates a low-frequency thump or scrape synchronized with the rotor’s revolution, distinct from the sharper knock of a universal joint issue.
5. Step 4: Interpreting the Sounds and Feelings
You’ve gathered the evidence. Now it’s time to play mechanic and match your findings to the classic symptoms. This is where you make the final call.
Diagnosis is pattern recognition. By correlating the specific type of noise and vibration with the component you found issues in, you can be confident in your conclusion before ordering a single part.
Here’s your quick-reference diagnosis decoder:
| Symptom | Most Likely Source | Confirmed By |
|---|---|---|
| Rhythmic “Knock” or “Clunk” at drive speed | Worn Universal Joint (Pin/Bushing) | Radial play in the “Manual Rock Test.” |
| Grinding/Gritty sound or feel when turning shaft | Contaminated/Dry Universal Joint or Worn Bushings | Black, gritty grease or lack of grease in joint. |
| High-Pitched Squeal/Screech | Dry Universal Joint or Extreme Rotor-Stator Friction | Isolate with Step 1. If noise stops when wet end is removed, it’s the joint. |
| Low-Frequency “Thump” or “Scrape” | Bent/Damaged Rotor or Obstructed Stator | Binding during the “Withdrawal Test” or visible rotor damage. |
| General Vibration with Loss of Flow | Worn-Out Rotor & Stator (excessive clearance) | Rotor slides too easily from stator; measurements show wear. |
Armed with this diagnosis, your repair becomes targeted and cost-effective.
The Path Forward:
Universal Joint Issue: Plan to replace the complete universal joint kit (pins, bushings, seals, sleeves). Never replace just one pin—replace as a matched set.
Rotor Issue: If damaged, replace the rotor. Always inspect the stator intimately. A new rotor in a worn or swollen stator will fail immediately. They are a mating pair.
Stator Issue: Replace the stator. Ensure the new elastomer is chemically compatible with your fluid.
Conclusion: From Diagnosis to Solution
Excessive noise and vibration in your SEEPEX pump are not mysteries—they are precise communications. By following this systematic isolation method, you move from anxious guesswork to confident diagnosis. Remember: the sharp knock points to the universal joint; the heavy thump or scrape points to the rotor-stator assembly. Addressing the correct problem saves you from unnecessary parts costs, repeated downtime, and the risk of secondary damage to your valuable pump.
Stop listening to the noise and start interpreting it. Let this guide turn those alarming sounds into a clear repair roadmap.
Heard enough? Don’t just guess the part. Send us your SEEPEX pump model, a description of the noise/vibration, and what you found during your checks. Our technical team will review your diagnosis and provide a guaranteed-compatible replacement universal joint kit or precision rotor—delivered with the correct grease and installation guidance. Contact us with your findings for a confirmed solution and quote. Fix it right, the first time.


