
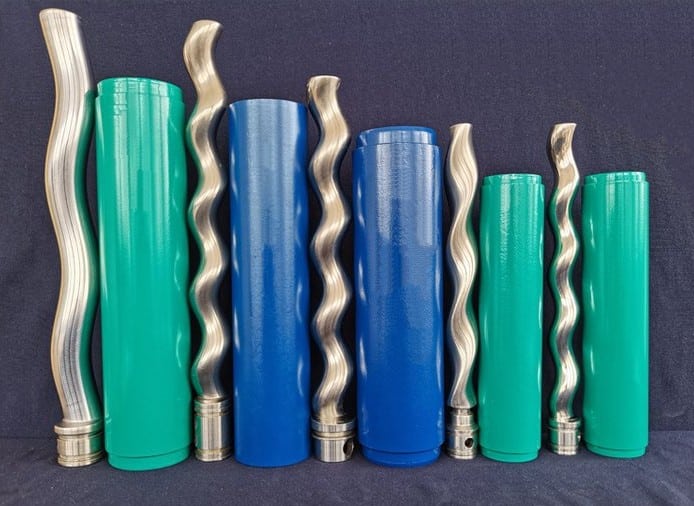
A progressive cavity pump rotor is a helical rotor and is also known as the main shaft or screw shaft. It’s fixed inside the pump stator. Both the helical rotor and pump stator are key components of the progressive cavity pump. The PC pump rotor rotates eccentrically. So it runs at a low speed.
The pump rotor is transmitting power and works together with the stator to form a closed and sealed cavity. By the rotation of the rotor and stator, the fluid or medium is successfully output from the PC pump system.
How to select the rotor material for a progressive cavity pump?
Before we decide on the raw material for the progressive cavity pump rotor, we must consider the pump working conditions and the medium which goes through the PC pump. That means we should take chemical compatibility and wear resistance into consideration.
When the medium is chemically corrosive, we normally suggest stainless steel (SS304/SS316/Duplex stainless steel) or titanium alloy. For example, stainless steel rotors are usually applied in the food industry. For the specific stainless steel serial number, please feel free to EMAIL us for detailed suggestions.
When the medium which is going through the pump contains fine particles, we have to fully consider the wear resistance of the pump rotor. You can select a harder raw material such as hardened tool steel or add a hard plating layer to the rotor surface, for example, HCP(Hard Chromium Plating).
Should I replace the pump stator and rotor at the same time?
The pump rotors run and fit with the stators in a progressive pump system. Similar to the pump stators, the PC pump rotors also wear out somewhat in the pumping work. But its wear speed is slower than the pump stator.
Therefore, sometimes, you only need the pump stator spare parts or the pump rotor replacements. For fluids that do not contain solid particles, one pump rotor can easily outlive 3 or even 4 stators.
However, in certain cases, we suggest you replace both the rotor and the stator at the same time to guarantee optimal performance and avoid premature wear on the newly replaced stator.
How to assemble or install a brand-new rotor and stator?
For progressive cavity pumps(also known as PC pumps), stator replacement or rotor replacement is normal. Sometimes, you even need to replace the rotor and stator at the same time. When you get a set of brand-new rotors and stators of a progressing cavity pump, how to install or assemble them? Here are 10 recommended steps for your information
- Step 1: Get the PC pump rotor, stator, relevant auxiliary parts and necessary tools ready.
- Step 2: Lubricate the internals of your new stator with a non-petroleum-based product before inserting the rotor into the pump stator.
- Step 3: Insert the new rotor into the stator. For easier installation, a press could be used to insert the rotor down into the pump stator.
- Step 4: We recommend you grease both the rotor head and the stator threads for a smooth turn. Screw the stator into your trough to align the connecting rod with the rotor head for pin alignment.
- Step 5: Align both the rotor head and the connecting rod pin holes and insert the pin. Once the pin is inserted, a hammer may be needed to fully insert the pin to its flush position with the rotor head.
- Step 6: Slide the boot back over the rotor head covering the pin.
- Step 7: Once the boot has been slid back in place tighten both clamps on the front and back of the boot.
- Step 8: After successfully connecting your rotor, begin screwing your stator into the tightening position.
- Step 9: Re-Install the bell reducer to the stator.
- Step 10: Fasten the U-Bolt to fully secure the stator.
Should you still have further questions on the pump stator or the single progressive cavity pumps, please feel free to EMAIL US or WhatsApp us for further suggestions or recommendations.
