


Is your once-reliable MONO pump struggling to meet its rated flow? Are you compensating by running it faster or longer, only to watch your energy bills climb? That frustrating performance drop is often a direct symptom of a silent but critical issue: a worn rotor. Ignoring it doesn’t just mean reduced output—it risks a cascade of failures in your entire pumping system. This guide will arm you with a clear diagnostic method to confirm rotor wear and, more importantly, show you how to select the optimal replacement rotor that doesn’t just fit, but enhances your pump’s lifespan and efficiency.
A drop in MONO pump performance—manifesting as reduced flow, loss of pressure, or increased power consumption—is most commonly caused by wear on the pump’s helical metal rotor. Diagnosing it involves checking for specific symptoms and measuring critical dimensions, while selecting the optimal replacement requires matching not just the geometry but also the material grade and surface treatment to your specific application’s demands, ensuring compatibility and longevity.
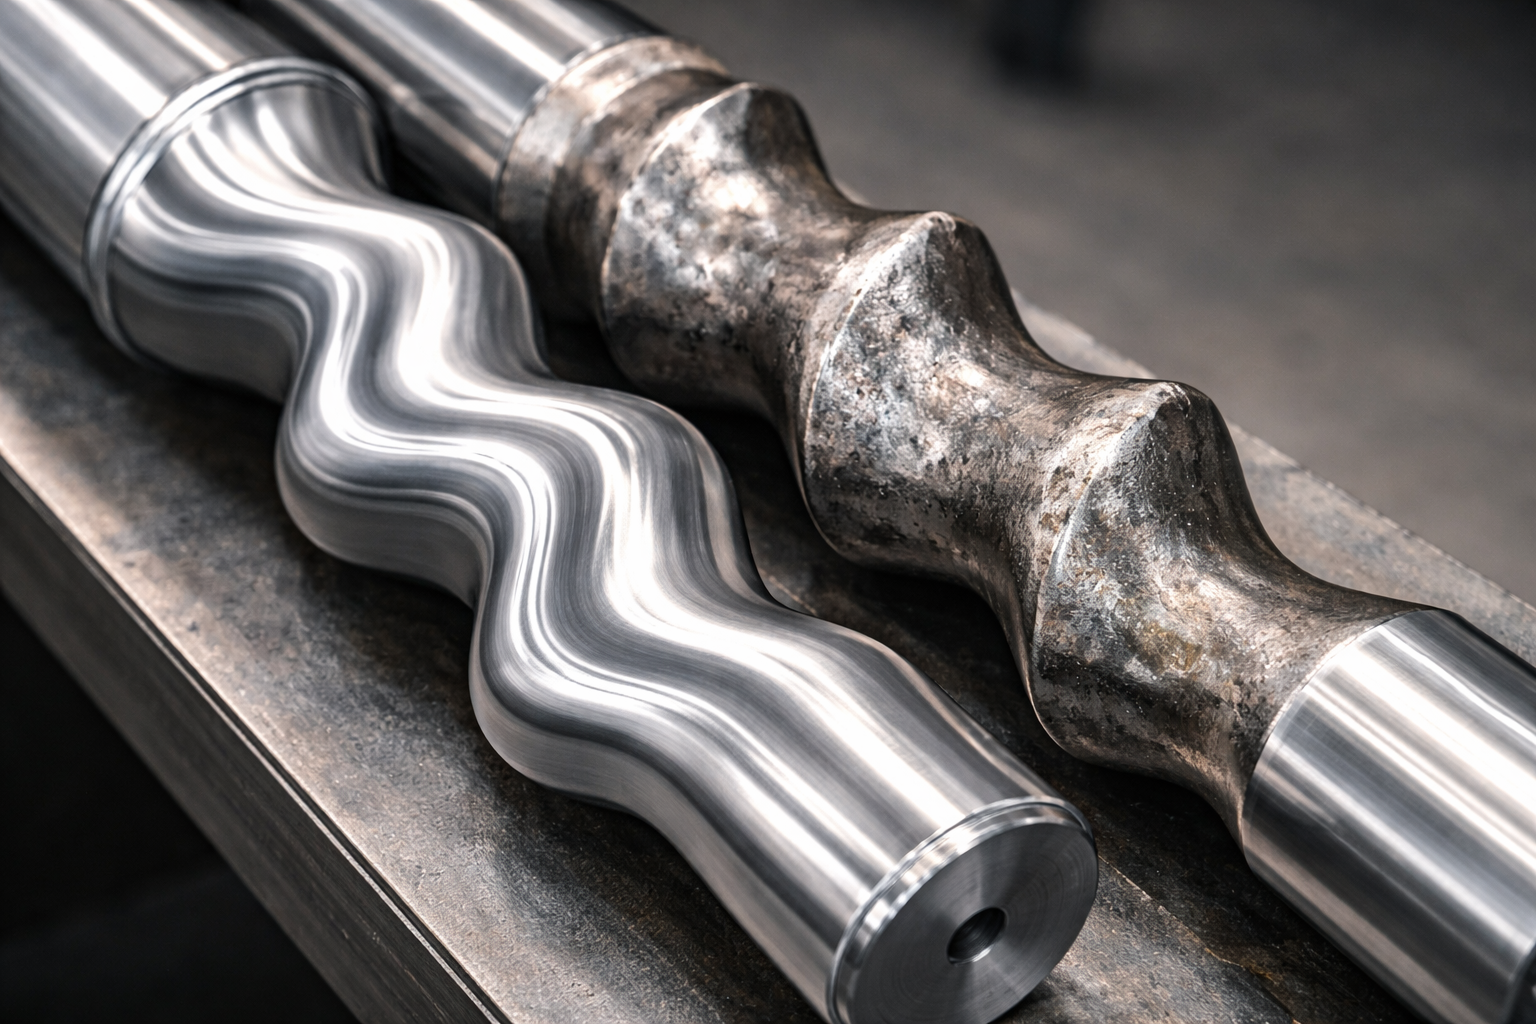
Table of Contents
The Tell-Tale Signs: Is Your MONO Pump Rotor Worn Out?
The Diagnostic Toolkit: How to Measure and Confirm Rotor Wear
Beyond “One Size Fits All”: Key Factors in Selecting Your Replacement Rotor
The Critical Partnership: Why Your Rotor’s Material Matters
Installation Insights: Ensuring Your New Rotor Performs to Spec
Conclusion: Restoring Peak Performance
1. The Tell-Tale Signs: Is Your MONO Pump Rotor Worn Out?
Your MONO pump won’t send you an error message when its rotor starts to fail. Instead, it communicates through its performance—or lack thereof. Learning to interpret these signals is the first step in proactive maintenance.
Think of the rotor as the heart’s main pumping chamber. As it wears, its ability to create a tight seal within the stator diminishes, allowing fluid to slip backward. This internal leakage is the root cause of almost all performance issues. Catching these signs early is the difference between a simple part replacement and costly system-wide damage.
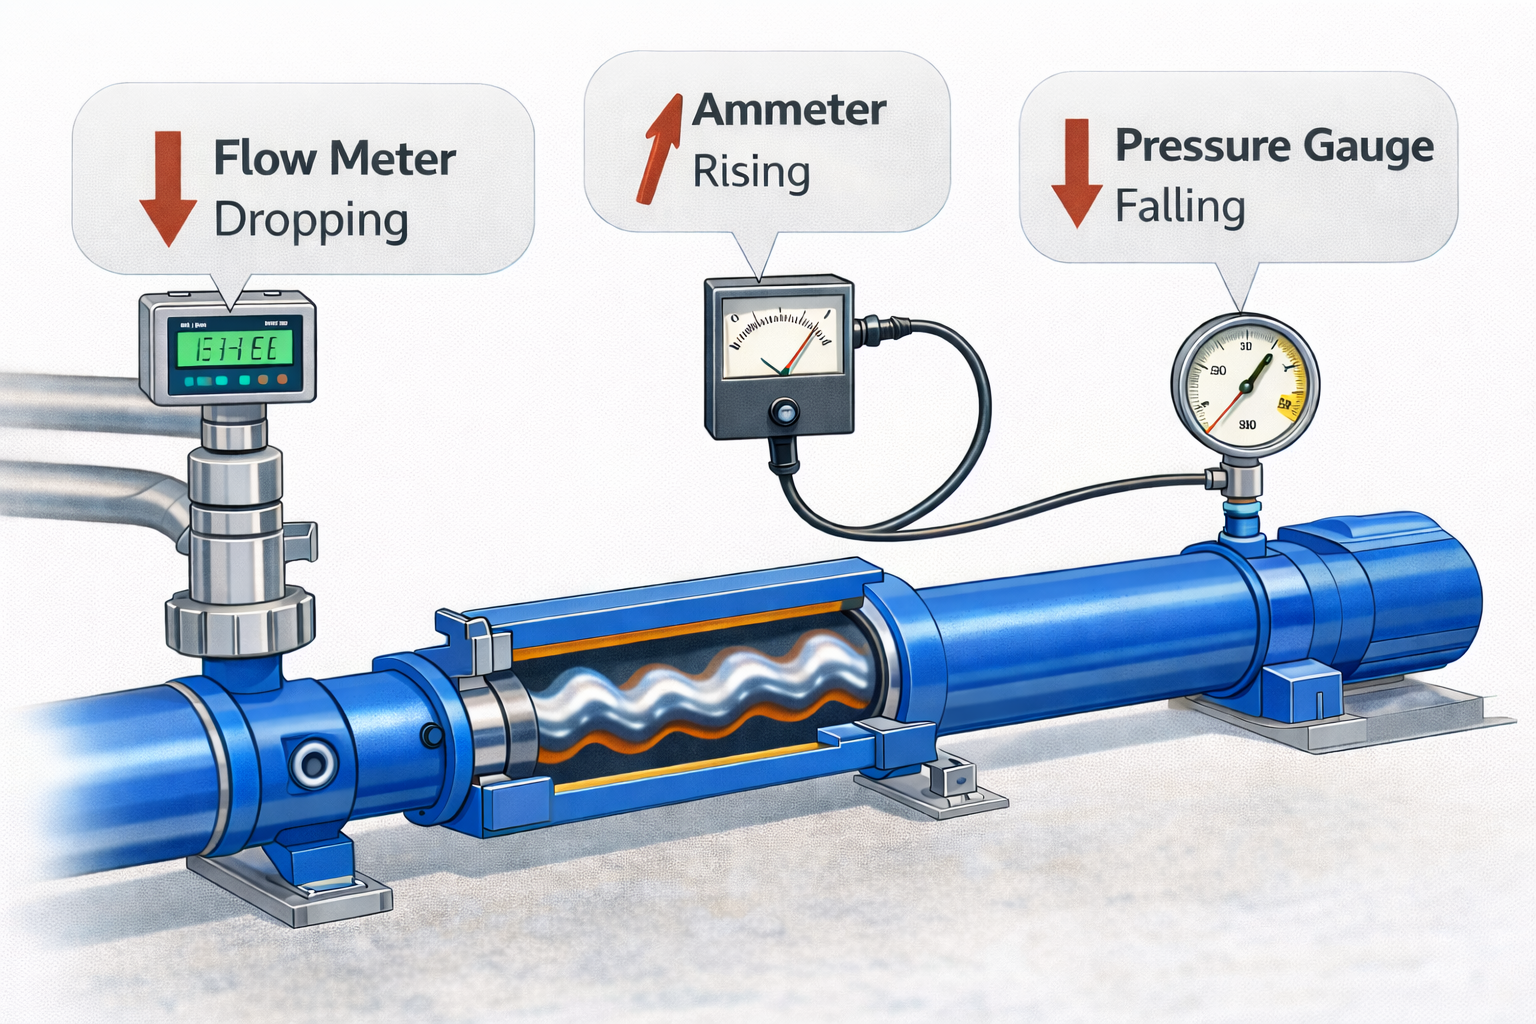
The most obvious symptom is a gradual decline in flow rate despite consistent pump speed. You might also notice the pump requires more amperage (power) to achieve the same work, or that it fails to build up to its expected discharge pressure. In severe cases, you may hear a grinding or rattling noise from the universal joint area, as a worn rotor can cause excessive vibration and misalignment.
Let’s explore how these symptoms directly link to the physical state of the rotor.
The Domino Effect of a Worn Rotor:
Surface Erosion: Abrasive particles in the fluid microscopically erode the rotor’s surface, changing its precise profile.
Clearance Catastrophe: This erosion increases the gap between the rotor and stator, breaking the seal of the progressing cavities.
Slippage Starts: Pumped media slips back from the discharge to the suction side through this enlarged gap.
Performance Plummets: This internal recirculation results in lower net flow, reduced pressure, and wasted energy.
| Symptom You Notice | What’s Happening Inside | Immediate Action |
|---|---|---|
| Lower output at the nozzle/pipe | Increased internal slippage. | Check system valves first, then measure pump performance. |
| Motor runs hotter, higher amp draw | The pump is working harder against slippage. | Record electrical readings; compare to baseline. |
| Product “bypass” or inefficiency | Cavities are not fully sealed. | Isolate and inspect the pump’s wet end. |
2. The Diagnostic Toolkit: How to Measure and Confirm Rotor Wear
Suspicion isn’t enough; you need evidence. Confirming rotor wear requires moving from observation to measurement. This process separates guesswork from a targeted solution.
You wouldn’t replace a car engine based on a strange noise alone—you’d run diagnostics. The same applies here. A systematic measurement approach saves you from replacing the wrong part or missing additional issues in the universal joint or driving shaft.
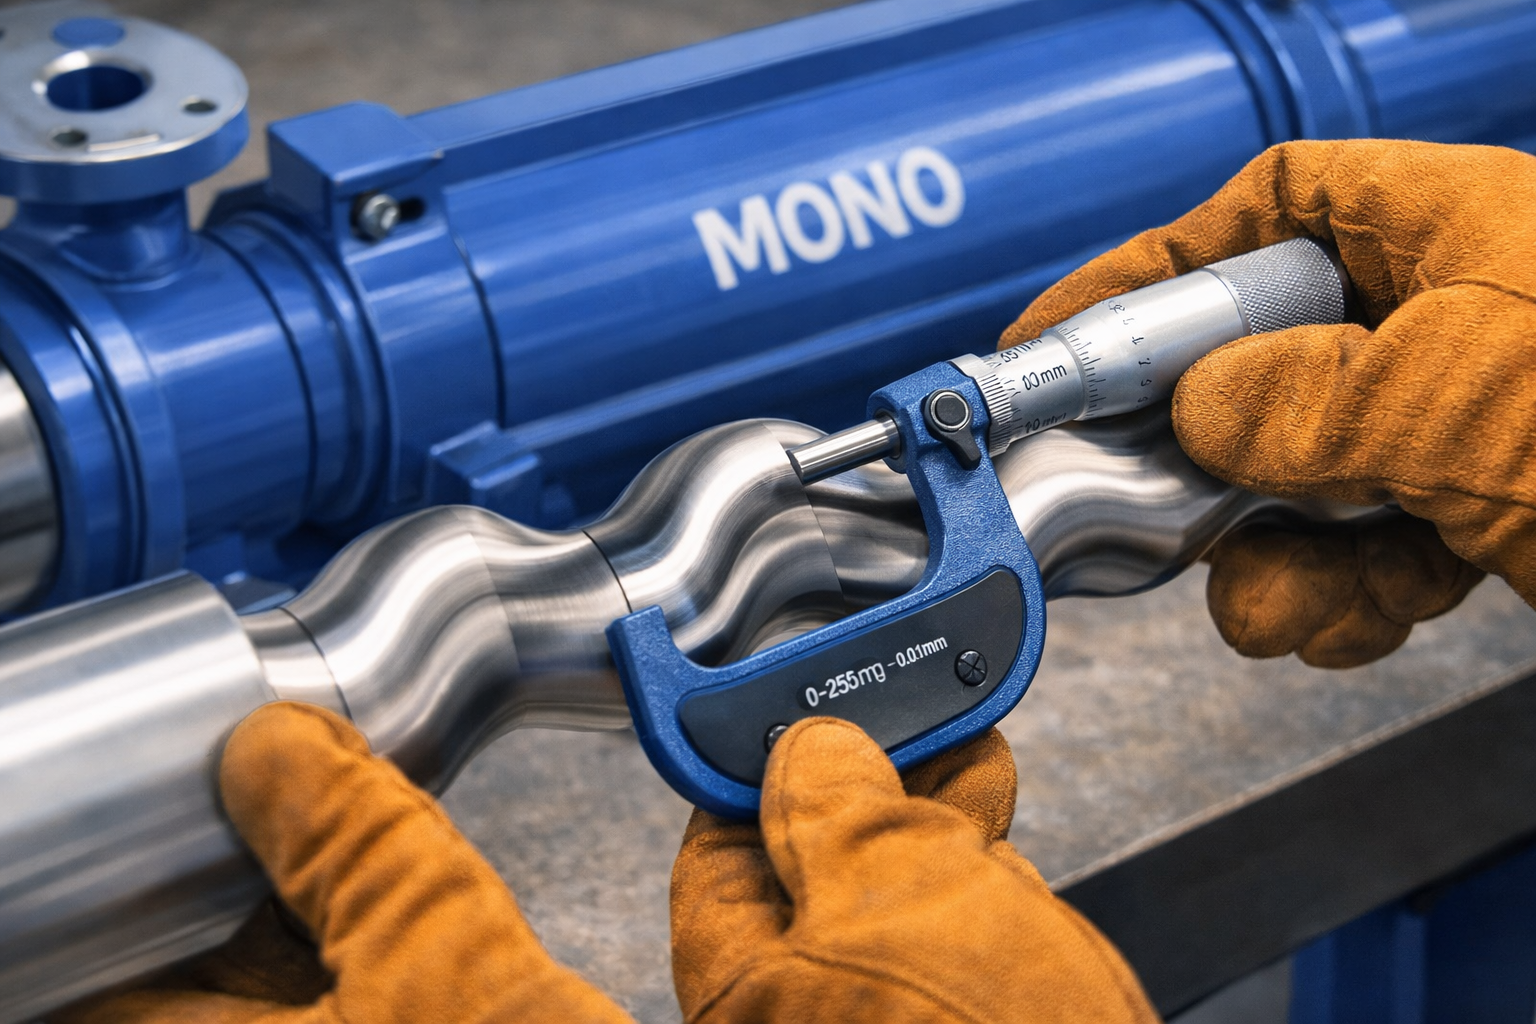
Once the pump is safely isolated and disassembled, the focus is on the rotor’s critical dimensions. You’ll need a set of outside micrometers and a profile gauge or template (often available from the pump manufacturer or a quality parts supplier like Top Level Intl.). The goal is to compare your rotor’s measurements against the OEM’s original specifications.
This diagnostic phase is where precision separates a temporary fix from a lasting repair.
The Three Pillars of Rotor Inspection:
Diameter: Measure the major and minor diameters at several points along the rotor’s length. Wear is rarely even. Compare each reading to the spec. Even a few tenths of a millimeter of loss can cause a significant performance drop.
Profile/Contour: This is the shape of the helical lobe. Use a profile gauge to check for flattening or distortion, especially at the lobe crests, which bear the most load. A worn profile won’t form perfect cavities.
Surface Condition: Look for scoring, pitting, or a general loss of the original smooth finish. Deep scoring is a clear sign of abrasive wear or dry running.
Pro Tip: Always inspect the stator’s elastomer condition simultaneously. A new rotor paired with a worn or degraded stator will fail immediately. The diagnosis should always consider this critical partnership.
3. Beyond “One Size Fits All”: Key Factors in Selecting Your Replacement Rotor
Finding a part with matching thread size is just the beginning. The optimal replacement rotor is engineered to match—or exceed—the original’s performance in your specific operating environment. This is where generic spares fail and engineered solutions succeed.
Choosing a rotor is like selecting a tire. You need the right size, but also the right tread compound for your driving conditions—highway, off-road, or in snow. A “compatible” rotor that ignores your application’s realities will wear out just as fast, restarting the costly cycle.
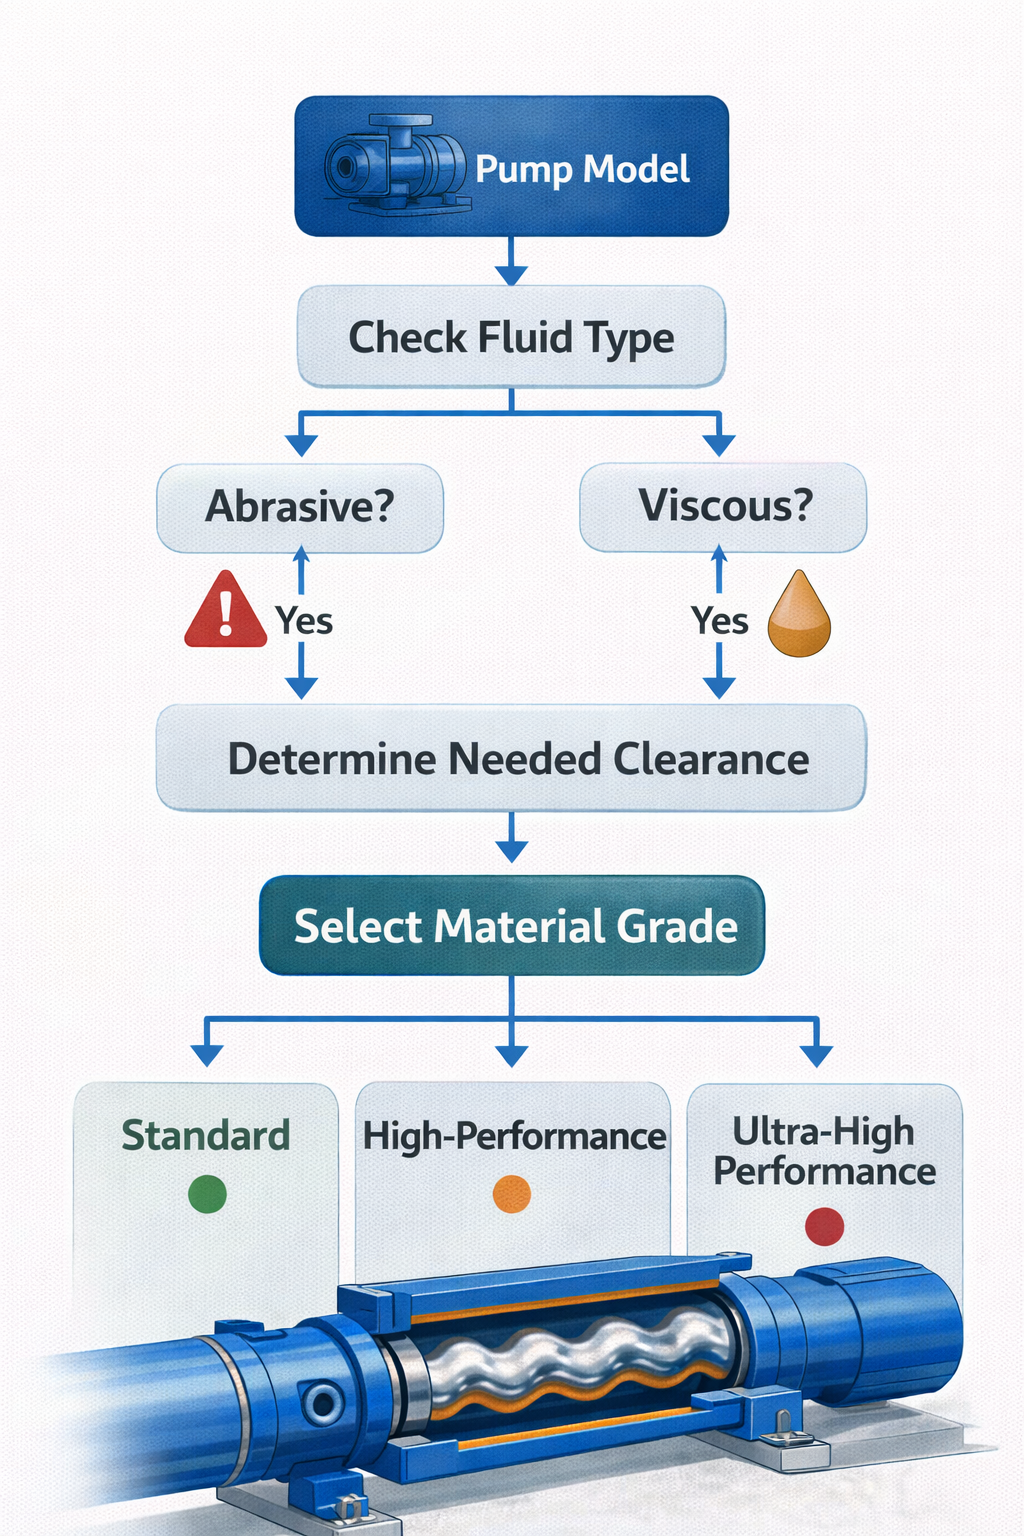
Beyond the basic pump model number, you must specify the rotor grade or clearance class. MONO pumps, like other progressive cavity pumps, are offered with different initial clearances (e.g., standard, tight, or loose) for different fluid types. Installing the wrong grade will lead to immediate overheating or rapid wear.
The selection process is a multi-variable equation. Let’s break down the key factors beyond the drawing dimensions.
1. Application-Driven Clearance:
Standard Clearance: For general-purpose applications with moderate viscosity and minimal abrasives.
Tight Clearance: Best for low-viscosity fluids or applications requiring higher pressure, as it minimizes internal slip.
Loose Clearance: Designed for highly viscous fluids, abrasive slurries, or those containing larger solids, providing more room to reduce shear and wear.
2. The Length Matters: Ensure the rotor length exactly matches your stator’s cavity. An incorrect length prevents proper cavity formation along the entire pumping path.
The Critical Question for Your Supplier: “Can you provide the rotor with the specific clearance class required for my application, not just the default standard?” A quality supplier like Top Level will ask for your media details to advise on this.
4. The Critical Partnership: Why Your Rotor’s Material Matters
The rotor isn’t just a shaped piece of metal; it’s a wear component engineered to resist specific forces. The base material and its surface treatment are your first line of defense against the very factors that caused the failure you’re fixing.
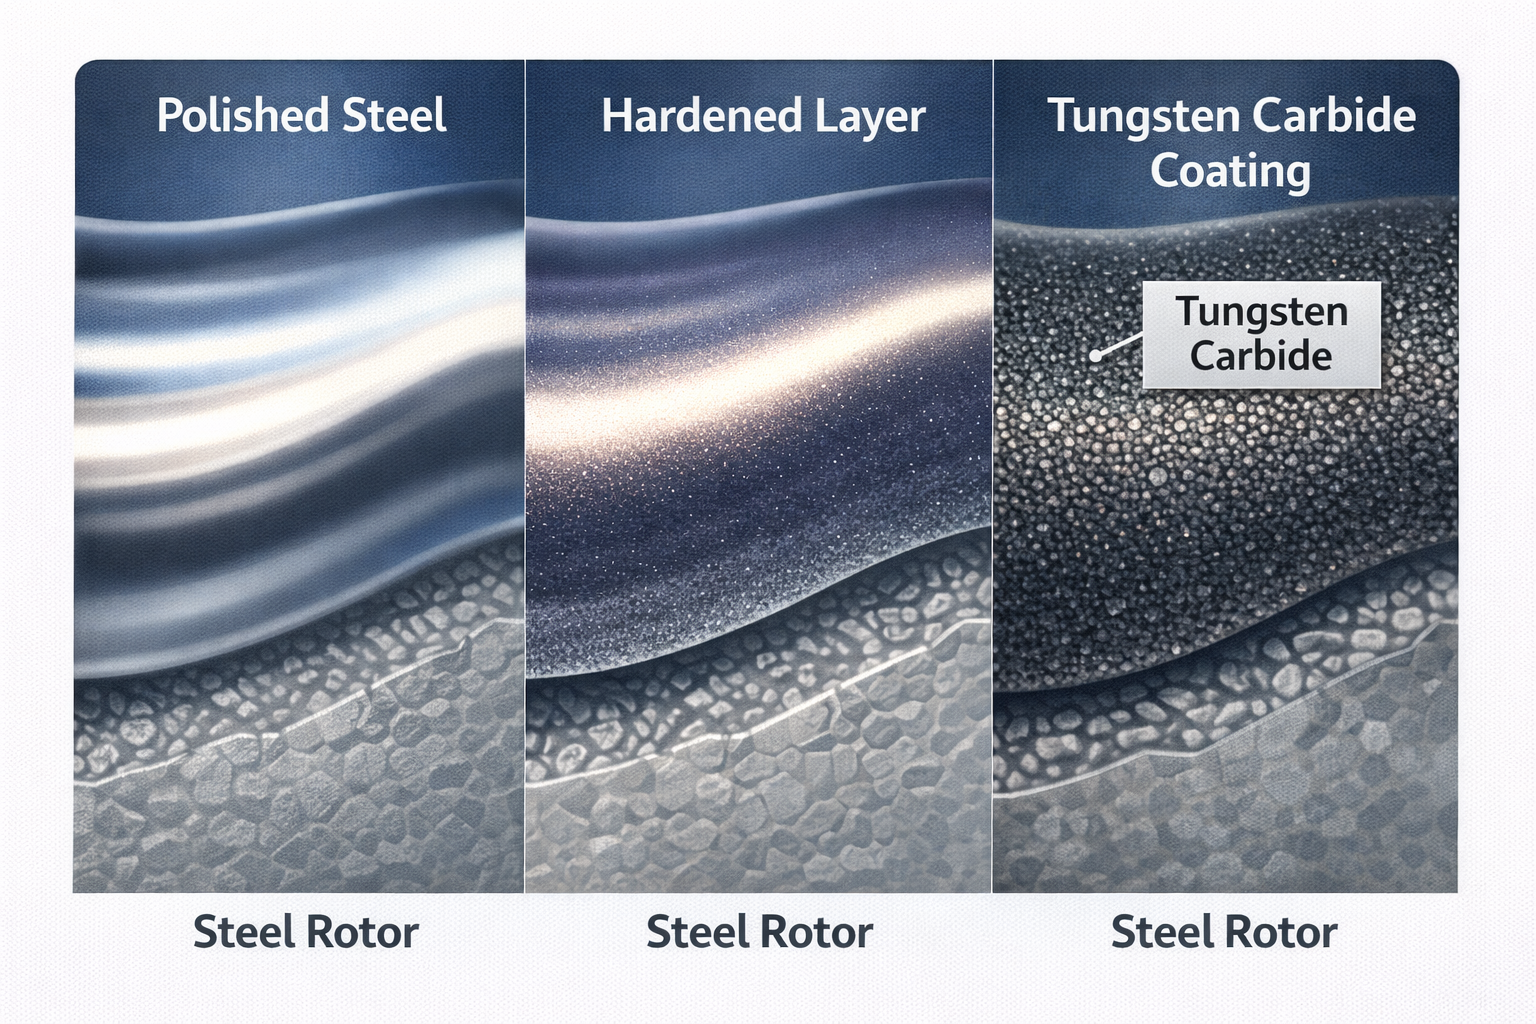
Imagine two rotors that look identical. One is made of standard carbon steel, the other from hardened tool steel with a tungsten carbide coating. In an abrasive slurry, the first might last 1,000 hours, while the second lasts 5,000. The material choice isn’t an upgrade—it’s a strategic calculation for total cost of ownership.
For most MONO pump applications, rotors are made from hardened stainless steel (like 440C or similar) for corrosion resistance and durability. However, the true performance differentiator often lies in the surface treatment or coating applied to this base material.
Selecting the material and finish is about creating a shield tailored to your primary adversary.
Matching the Defense to the Threat:
| Your Primary Challenge | Recommended Rotor Specification | How it Fights Wear |
|---|---|---|
| Abrasive Slurries (e.g., wastewater, mining) | Through-Hardened Steel or Tungsten Carbide Coating | Provides an extremely hard surface to resist cutting and erosion from sand, grit, or particles. |
| Corrosive Chemicals (e.g., acids, solvents) | High-Grade Stainless Steel (316/316L) with Passivation | Maximizes chemical resistance to prevent pitting and uniform corrosion. |
| Sticky/Adhesive Media (e.g., sludge, food paste) | High-Polish Mirror Finish | Creates a super-smooth surface that prevents material adhesion and eases cleaning. |
| General Purpose / Mixed Duty | Hardened & Ground Finish | Offers an excellent balance of durability, corrosion resistance, and cost-effectiveness. |
Remember: Always ensure the rotor material is compatible with your stator elastomer to prevent galvanic corrosion or excessive wear on the softer stator.
5. Installation Insights: Ensuring Your New Rotor Performs to Spec
A perfect rotor can be ruined in minutes by a rushed or incorrect installation. This phase is about protecting your investment and ensuring the new component integrates seamlessly with the rest of the eccentric screw pump assembly.
The installation is the final quality check. It’s where you verify that your diagnosis was correct, that the new part fits perfectly, and that all related components—like seals and joints—are in good order. Skipping steps here can lead to immediate premature failure.
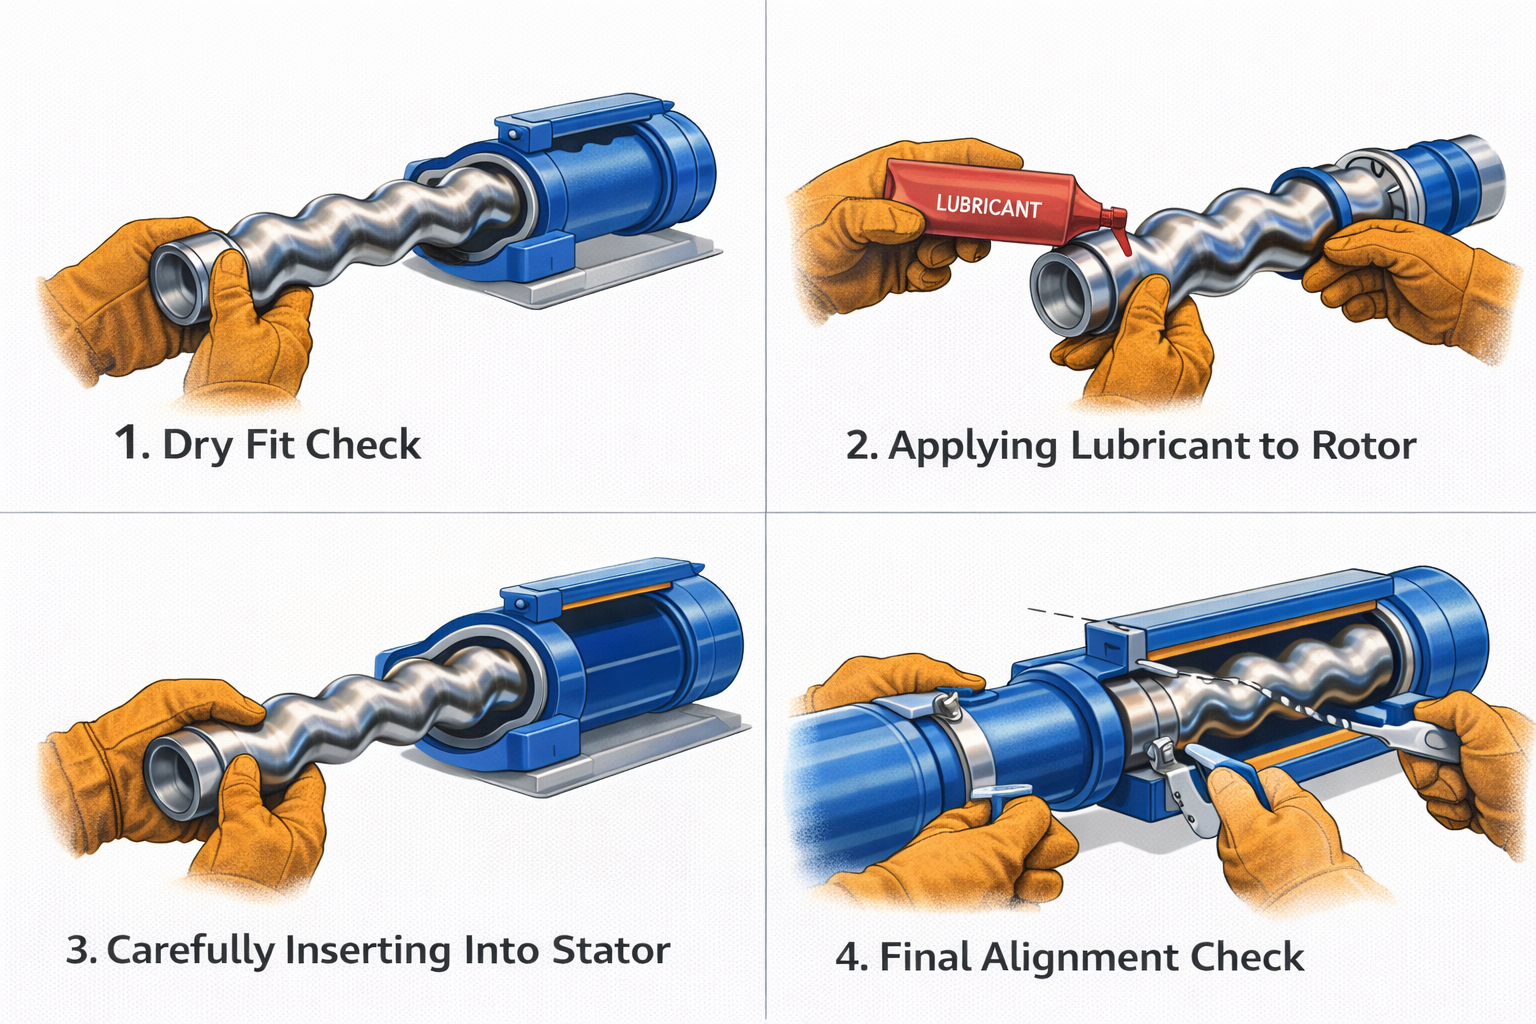
Before installation, perform a “dry fit” without the stator to check the rotor’s alignment with the connecting shaft and universal joint. It should rotate freely without binding. Crucially, always use the recommended lubricant (often a simple soap solution or food-grade lubricant) on the rotor surface before inserting it into the stator. This prevents tearing the elastomer on first start-up.
Proper installation secures the rotor’s lifespan from minute one.
The Non-Negotiable Installation Checklist:
Cleanliness: Ensure the pump housing, connecting shaft, and universal joint are free of old debris and residue.
Lubrication: Never install a rotor dry. Use a generous amount of the appropriate, media-compatible lubricant.
Alignment: As you reassemble, ensure the rotor engages smoothly with the universal joint pins. Forced assembly can damage the coupling rod and bushings.
Break-in: If possible, initiate the first start-up at a reduced speed and pressure for a short period. This allows the new rotor and stator to seat together properly.
Final Verification: After installation and a brief run, re-check the pump’s performance against its curve. You should see a marked improvement in flow and pressure at the same power input, confirming the successful repair.
Conclusion: Restoring Peak Performance
Diagnosing and resolving a MONO pump performance drop isn’t just about swapping a worn part. It’s a systematic process of reading the symptoms, confirming the cause with precision measurements, and then making an informed selection that addresses the root of the wear. By choosing a replacement rotor engineered for your specific fluid, abrasiveness, and duty cycle, you don’t just return to baseline—you often gain improved efficiency and a longer service life, transforming a repair cost into a valuable upgrade.
Stop tolerating declining output and rising energy costs. Let this be the last time you replace a worn rotor on a guessing game.
Ready to end the cycle of premature wear and performance drops? Don’t just order a generic part. Send us your MONO pump model number, serial number, and a description of your pumped media. Our engineers will analyze your application and provide a recommendation for the optimally engineered replacement rotor—with the correct clearance, material grade, and surface finish to outlast the original. Contact our technical support team today for a personalized solution and quote. Get back to 100% performance, reliably.


